Creating a Sourcing Request
A Sourcing Request (SR) is used to request products or services that are not currently available to purchase in Syncor through the Purchase Request workflow.
Once the request is approved internally, it is sent to the ProcureNet procurement team for review and sourcing.
A Sourcing Request can only contain:
- One request type: Product or Service
- One category
- Items with the same chargeability selection
Create separate Sourcing Requests when the type, category, or chargeability is different.
Step 1: Open the Sourcing Request Page
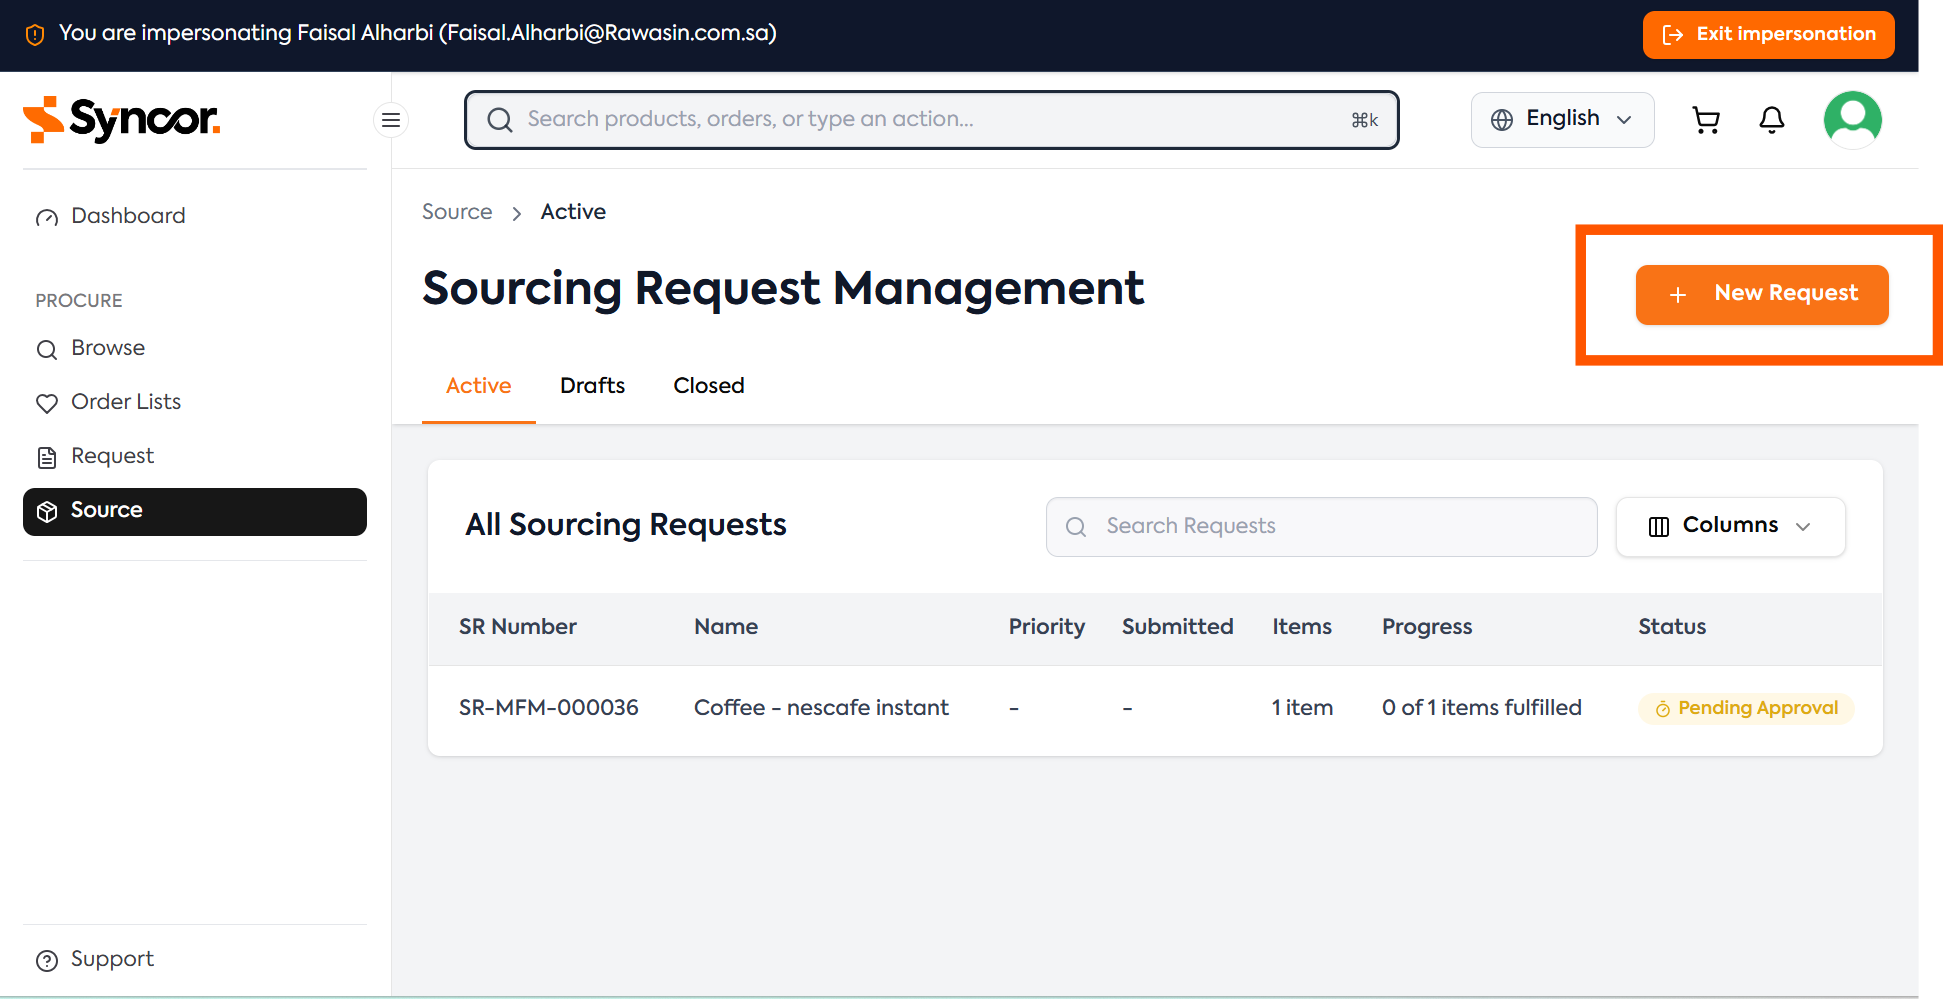
From the navigation menu:
- Select Source.
- Select New Request.
Step 2: Select Product or Service
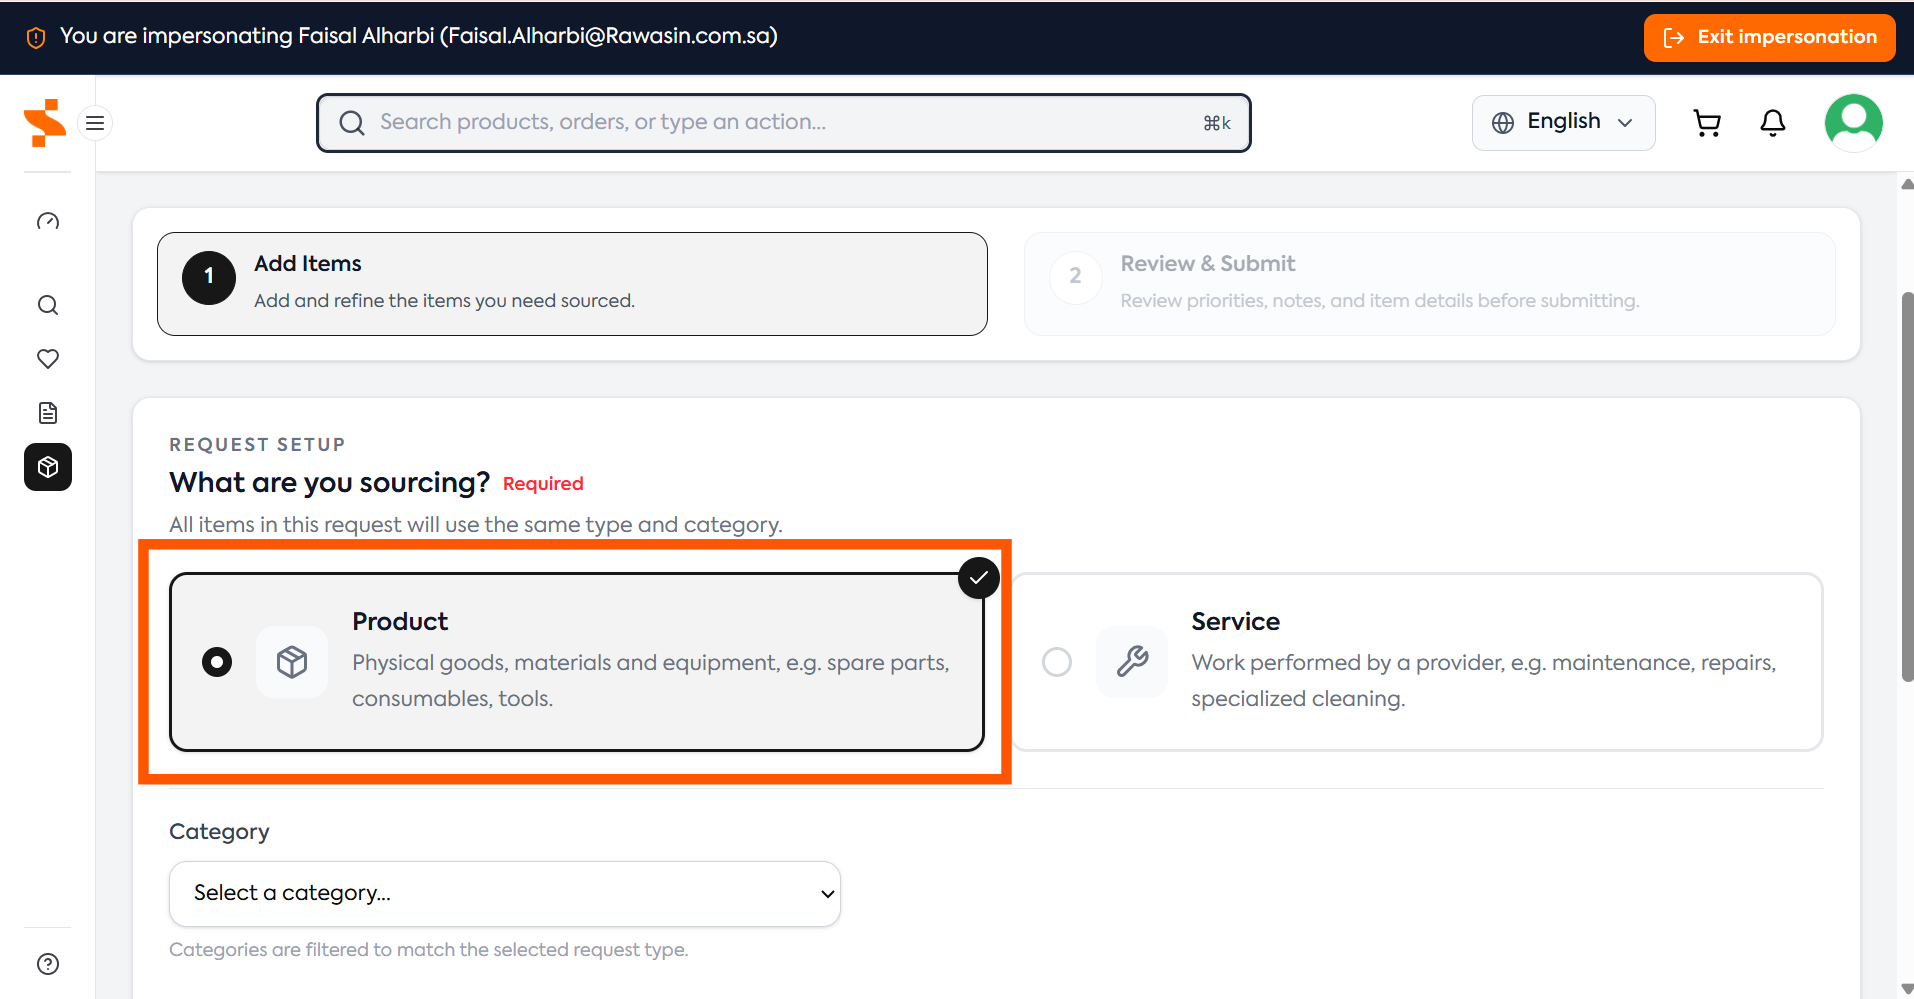
Choose whether the request is for a Product or a Service.
Product
Select Product when you need physical goods, materials, consumables, or equipment.
Examples include:
- Coffee
- Tea
- Milk
- Sugar
- Cleaning chemicals
- Office supplies
Service
Select Service when you need work to be performed by a supplier or service provider.
Examples include:
- Landscaping
- Pest control
- HVAC maintenance
- Catering
- Cleaning services
Products and services cannot be included in the same Sourcing Request.
For example, coffee is a Product and landscaping is a Service, so they must be submitted as two separate requests.
Step 3: Select a Category
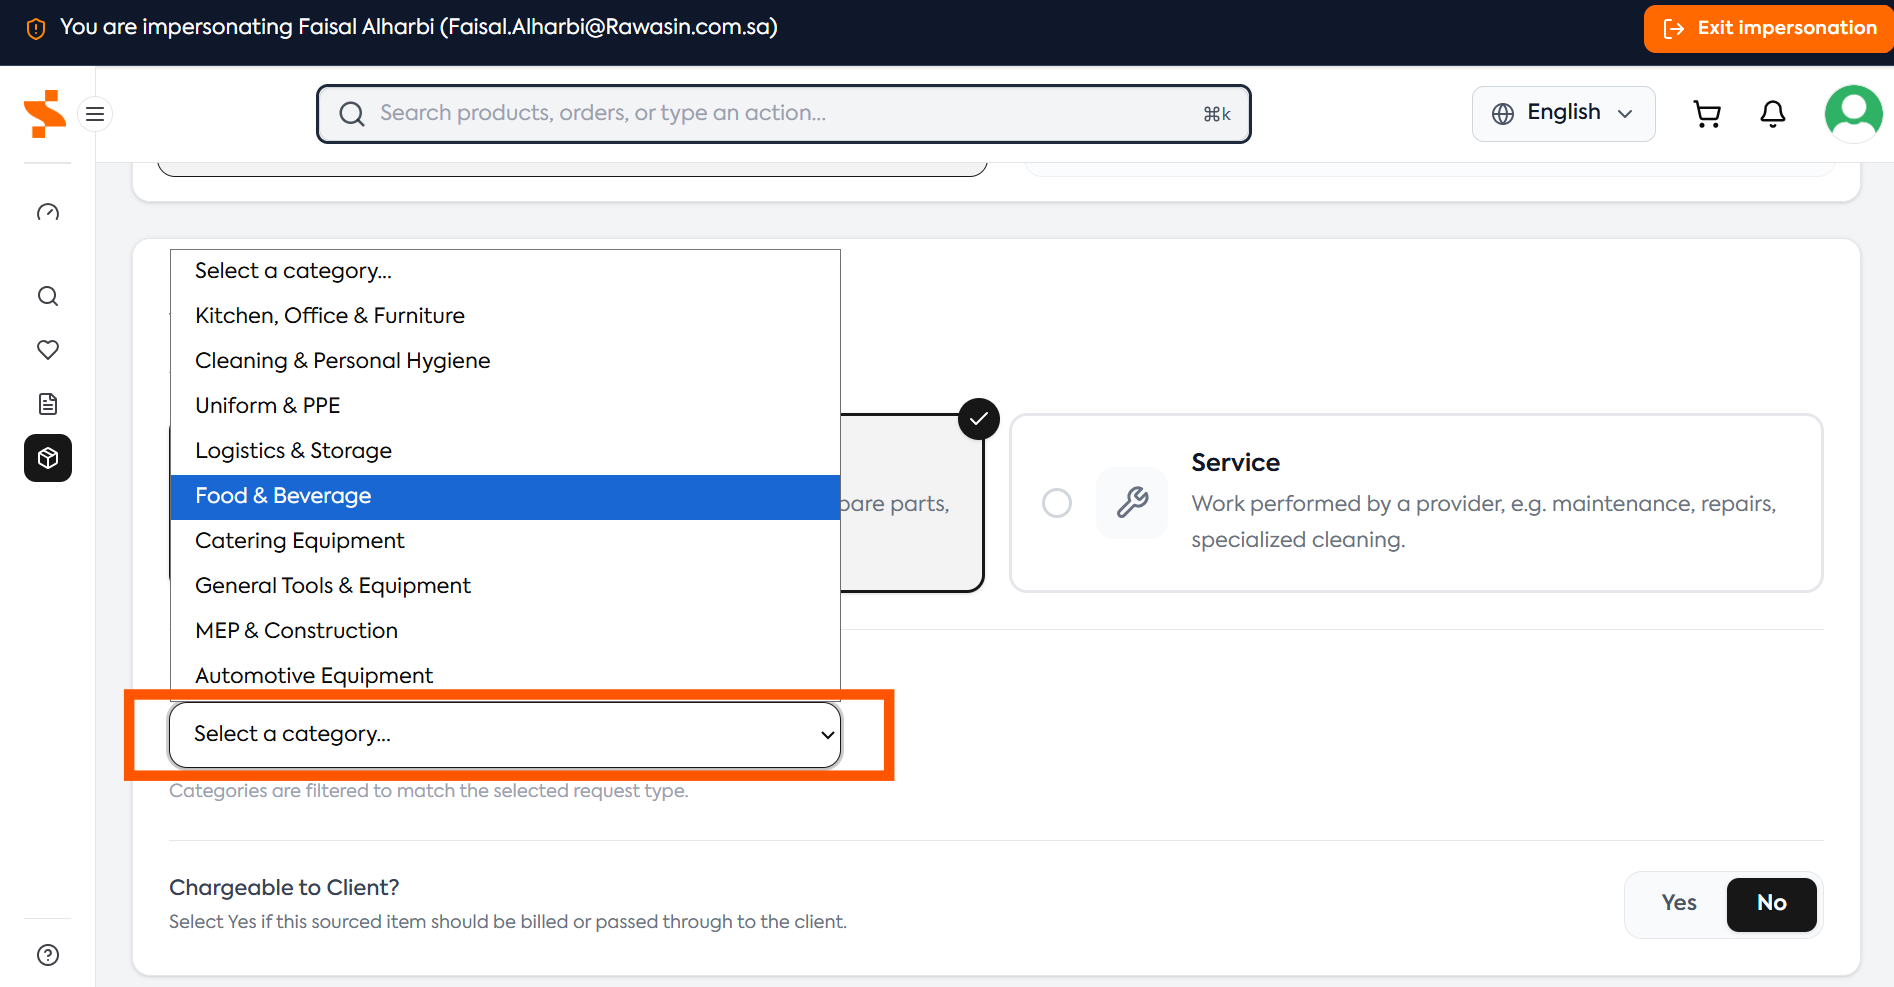
After choosing Product or Service, select the category that best matches the requirement.
A Sourcing Request can only belong to one category.
Items that can be included together
Coffee, milk, tea, and sugar can be included in one request because they are all products in the Food & Beverage category.
Items that require separate requests
Coffee and glass cleaner require separate requests because:
- Coffee belongs to Food & Beverage.
- Glass cleaner belongs to Cleaning & Personal Hygiene.
Coffee and landscaping also require separate requests because they are different request types and different categories.
Choose the category that appears to be the closest match. Do not delay the request if you are unsure. The ProcureNet procurement team can review and reclassify the request after submission if required.
For detailed descriptions and examples for every category, see Understanding Categories
Step 4: Select Whether the Request Is Chargeable to the Client
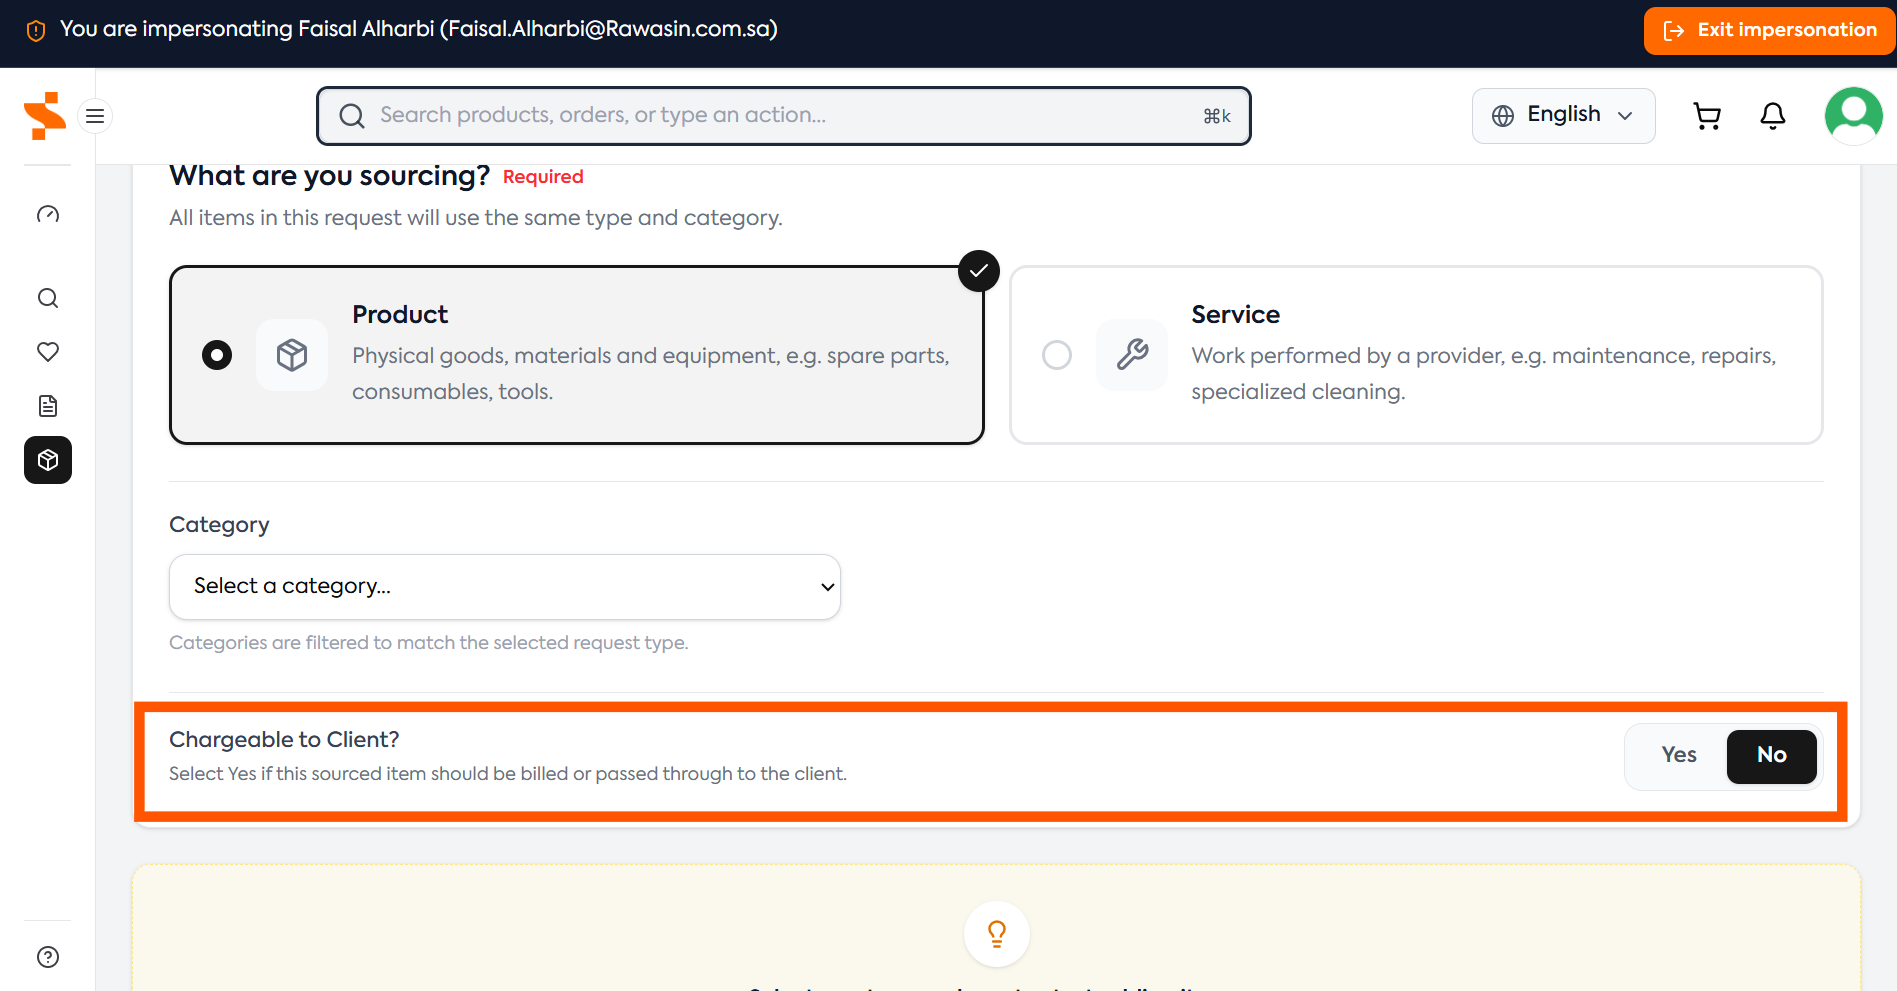
Select Yes or No for Chargeable to Client?
A chargeable product or service is one that should be billed or passed through to the client.
How to decide
Before selecting an option, ask:
- Is the client paying for this product or service?
- Does the contract state that this cost can be charged to the client?
- Is this a pass-through cost under the contract?
If you are unsure, check with the Client Manager or Account Manager before submitting the request.
This selection is important for correct client billing. An incorrect selection could result in the client being overcharged or undercharged, or your company not recovering a cost that should have been billed.
Mixed chargeability
Items with different chargeability must be submitted in separate Sourcing Requests, even if they belong to the same category.
For example:
- Coffee is chargeable to the client.
- Milk, tea, and sugar are not chargeable to the client.
Create one request for the coffee and a separate request for the milk, tea, and sugar.
Step 5: Add Items
You can add as many items as required, provided all items:
- Are the same request type
- Belong to the same category
- Have the same chargeability selection
For example, coffee, milk, tea, and sugar can be added to the same request if they are all chargeable or all non-chargeable.
Glass cleaner requires a separate request because it belongs to a different category.
Items can be added:
- Individually
- Through batch upload
This guide starts with adding items individually.
Step 6: Add an Item Individually
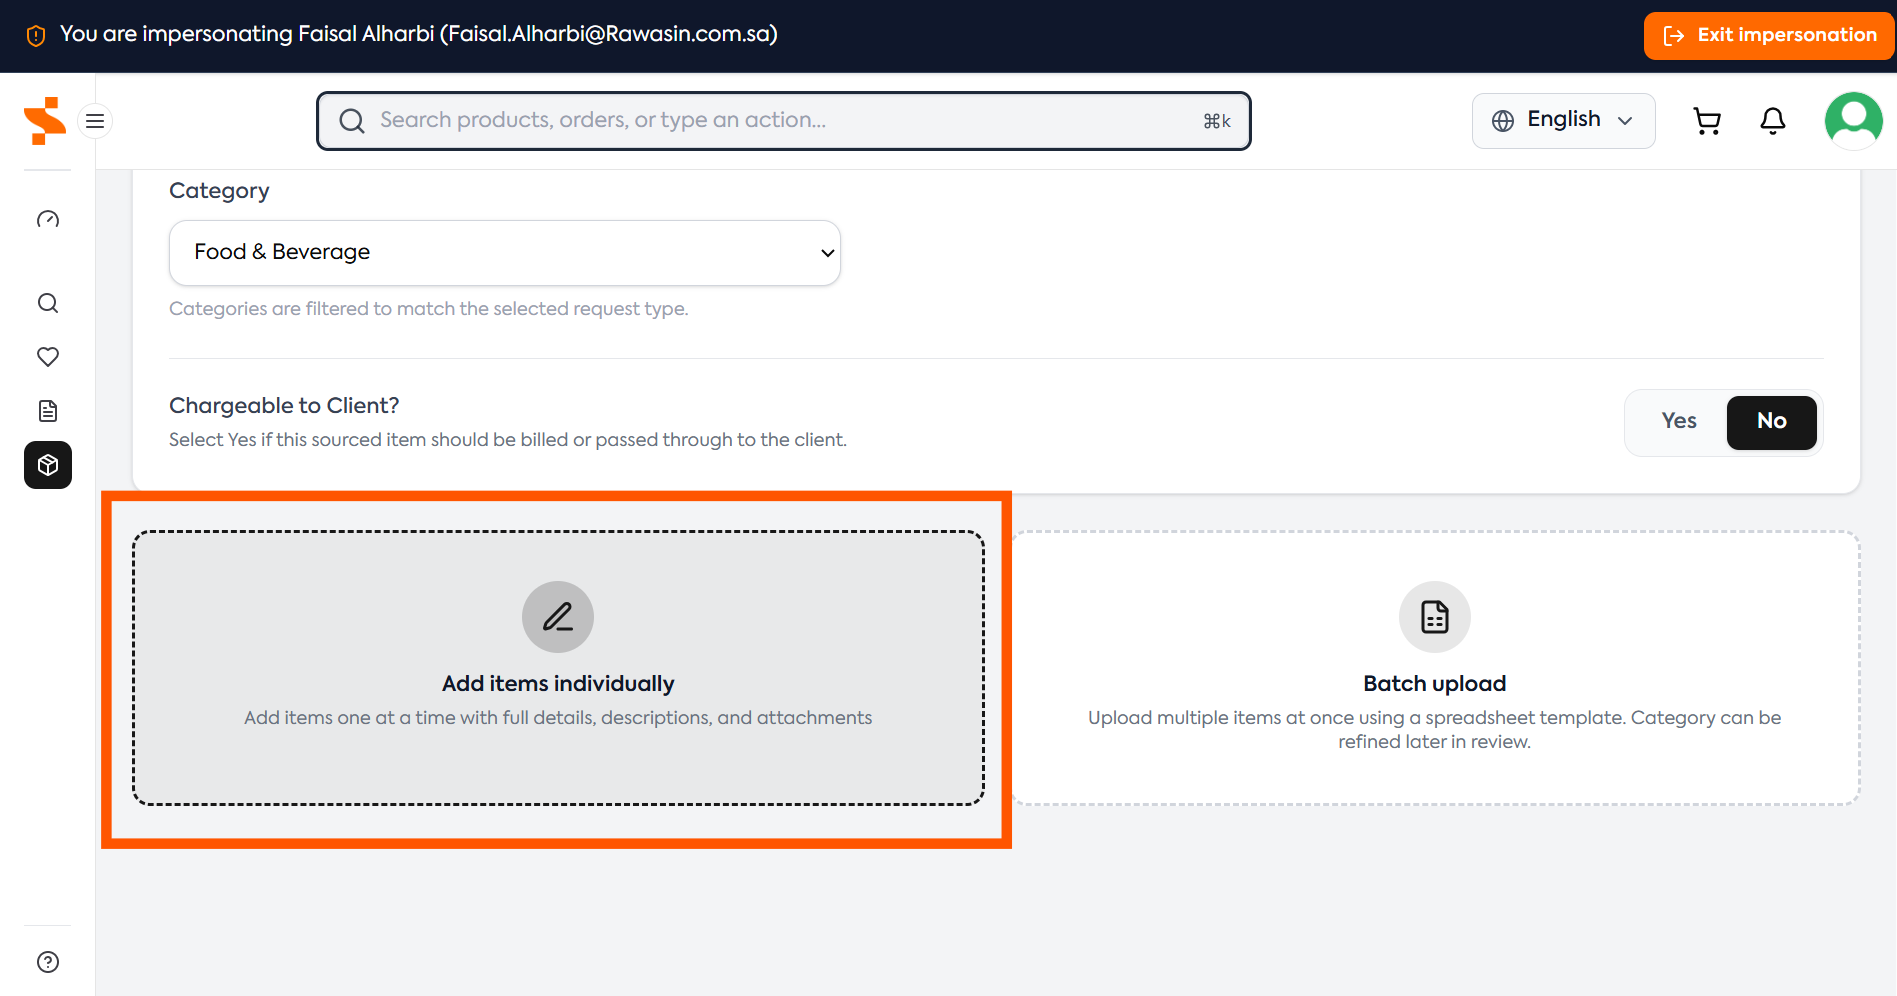
Complete the item details for each product or service.
Product or Service Name
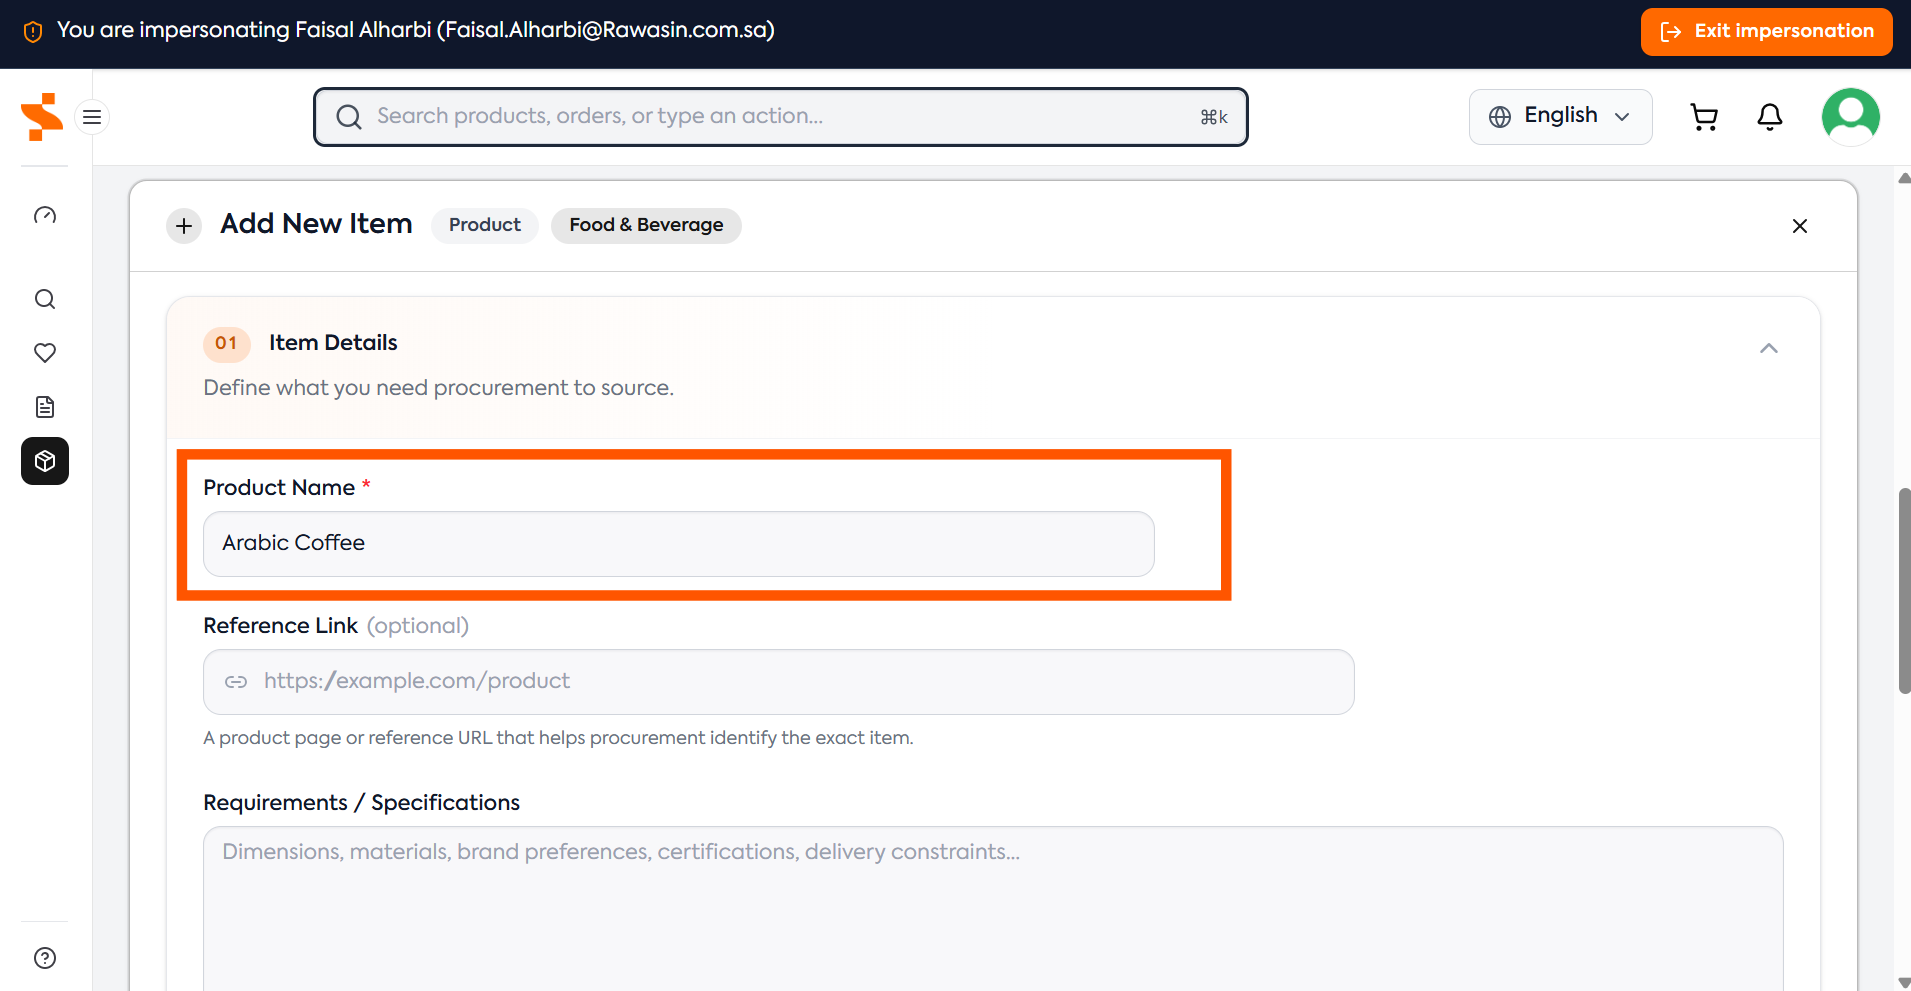
The name is mandatory. Use a clear and recognizable name.
Example:
Arabic Coffee
Reference Link
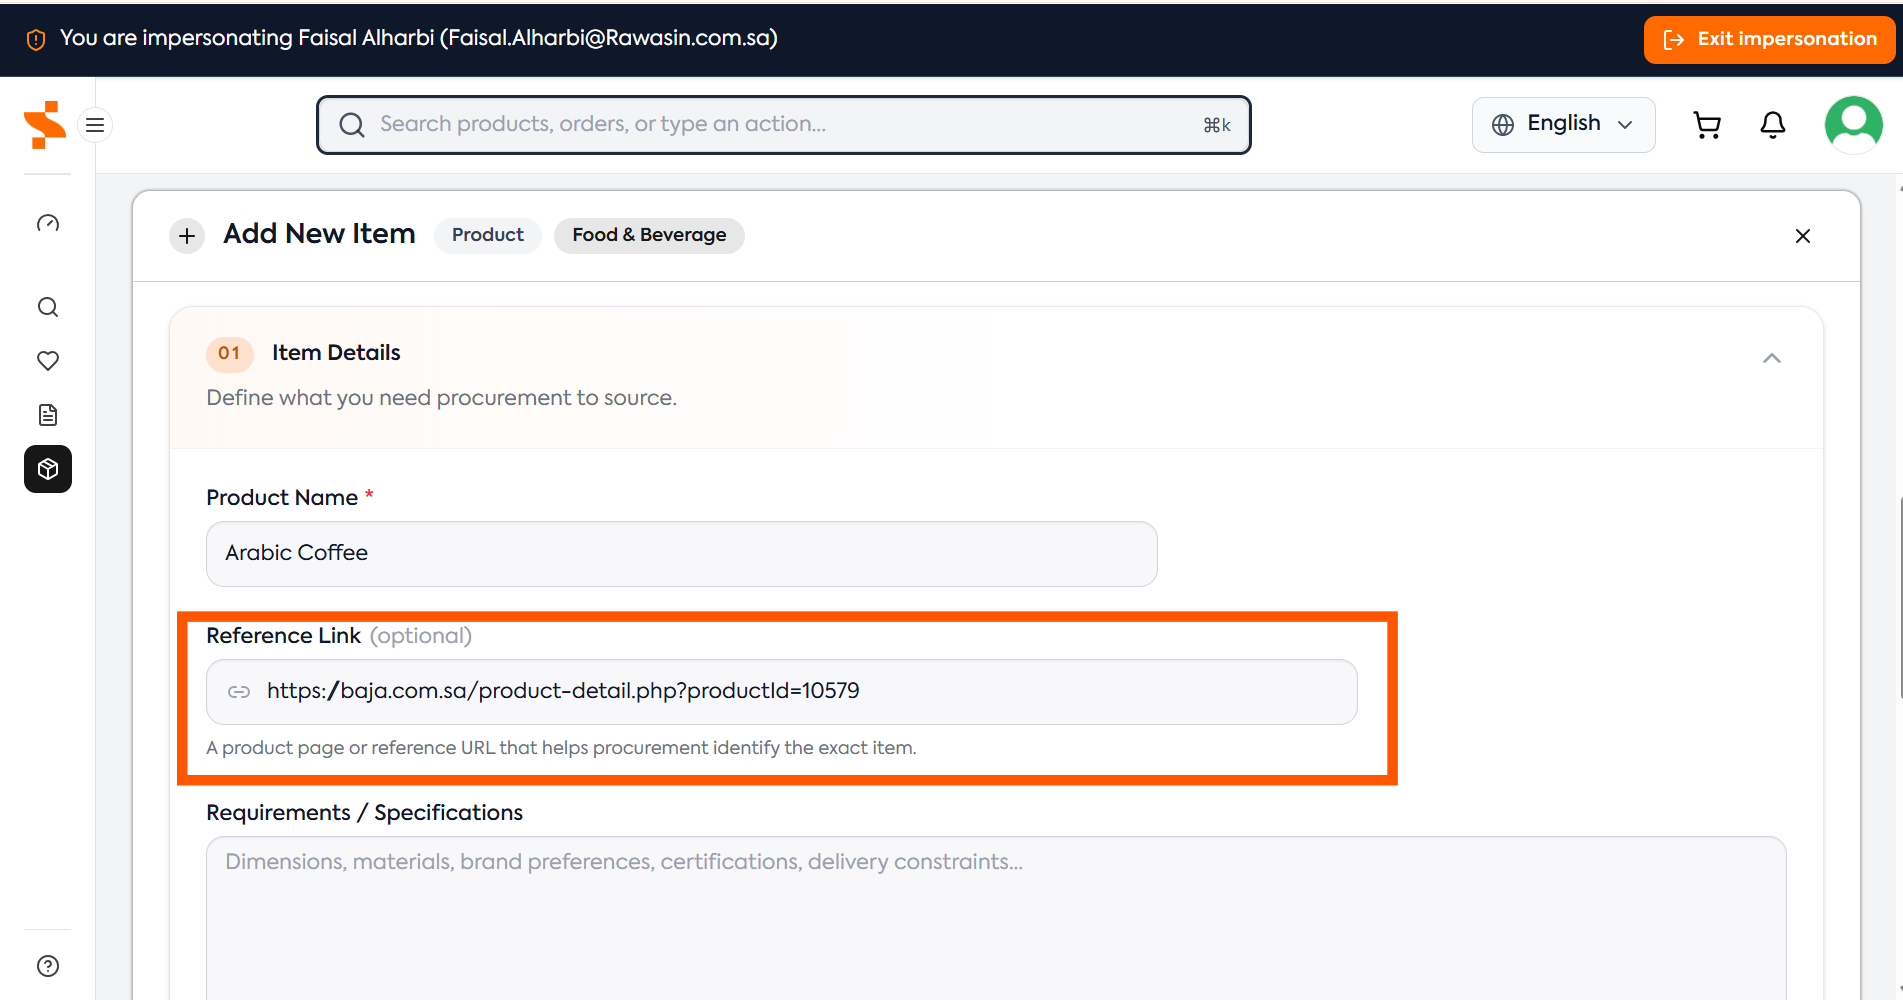
The reference link is optional, but it is highly recommended when an online example is available.
You can provide a link to a product on:
- A manufacturer website
- A supplier website
- Amazon
- Another online store or catalogue
A reference link can help the ProcureNet category buyer understand the expected product, packaging, brand, appearance, or technical details.
Requirements and Specifications
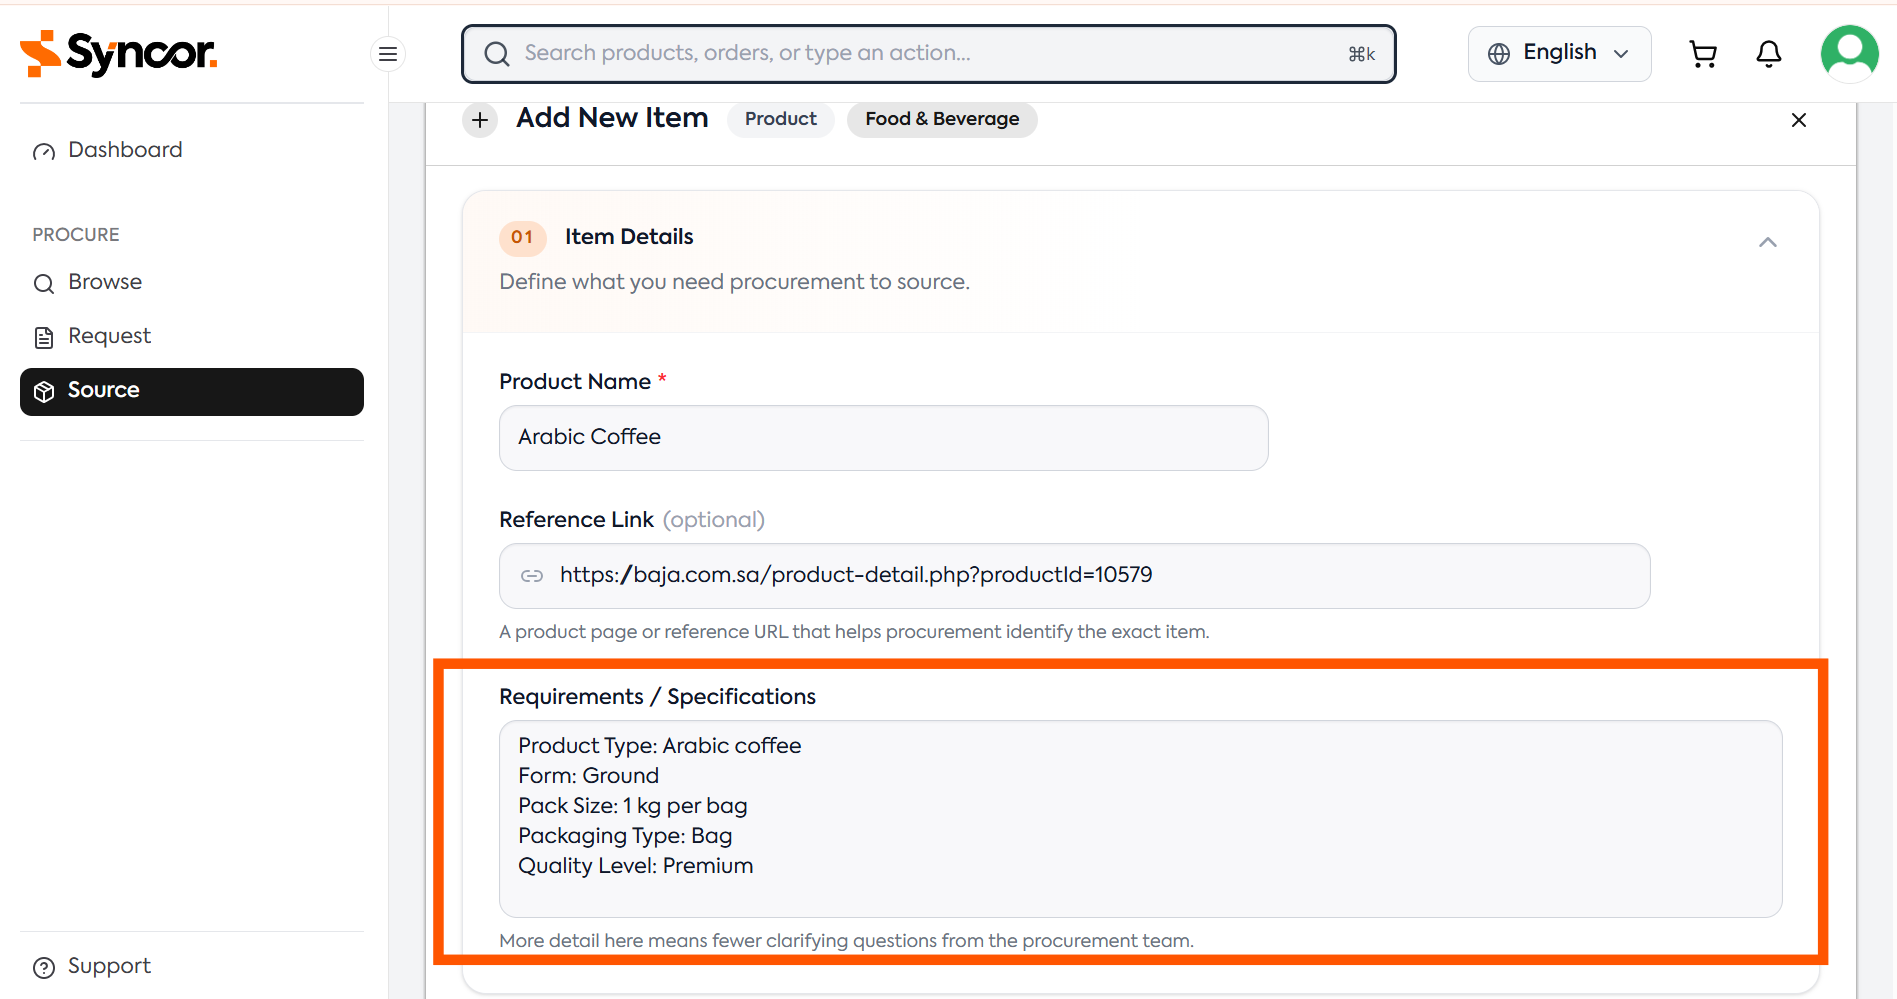
Provide enough information for the ProcureNet category buyer to identify, compare, and source the correct product. For more information about what kind of requirements and specs you should provide see Understanding Requirements
Poor Example
Arabic
This does not provide enough information for the category buyer to identify the required product.
Better Example
Product Type: Arabic coffee
Form: Ground
Pack Size: 1 kg per bag
Packaging Type: Bag
Quality Level: Premium
Clear specifications help ProcureNet obtain more competitive quotations, reduce clarification questions, and complete the sourcing process more quickly.
Step 7: Enter Quantity and Timing
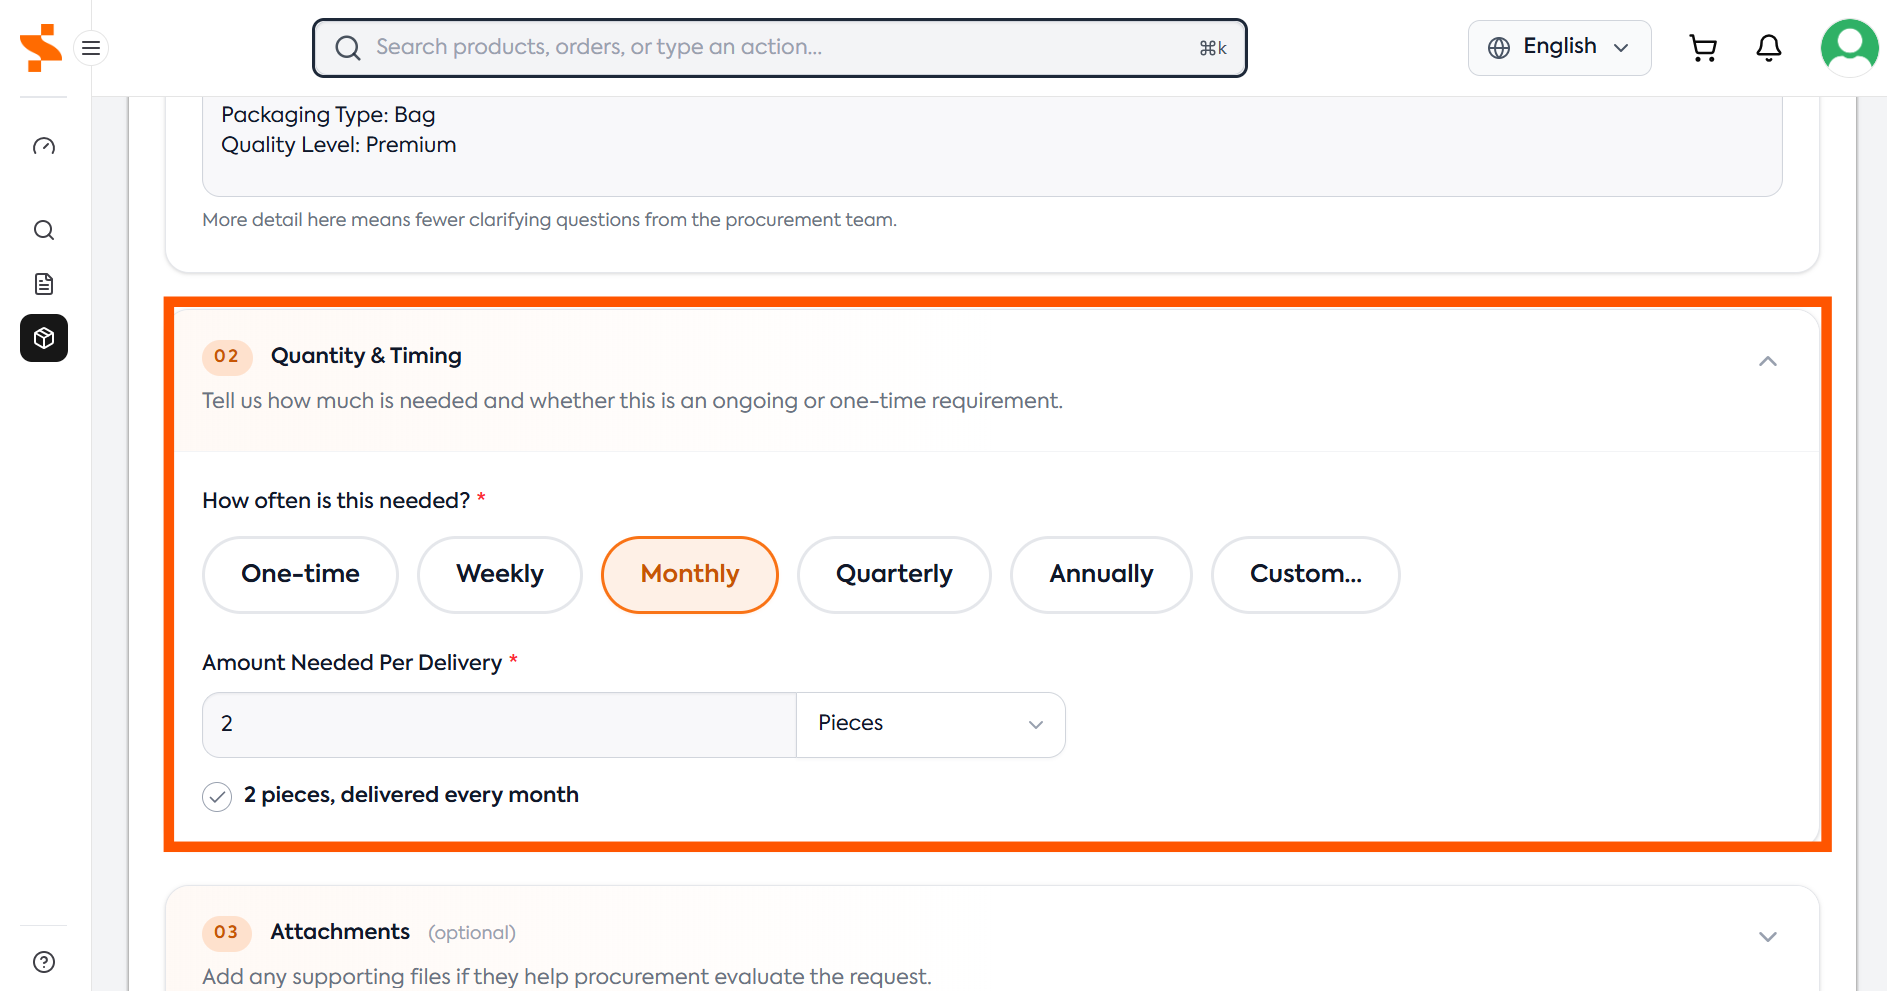
State how much is required and whether the requirement is one-time or recurring.
Select the frequency
Available options include:
- One-time
- Weekly
- Monthly
- Quarterly
- Annually
- Custom
Select One-time when the requirement is not expected to repeat.
Select the Unit of Measure
Select the appropriate Unit of Measure (UOM), such as:
- Pieces
- Boxes
- Rolls
- Bags
Then enter the quantity required.
Include the pack size in the specifications. two pieces of coffee could mean, two 250g bags, two 1kg bags, which are different volumes. Accurate quantity, pack size, and frequency information helps category buyers understand the total expected volume and negotiate pricing using better demand information and speeds up the sourcing process.
Step 8: Add Attachments
Add any supporting documents or images that will help ProcureNet understand or validate the requirement.
Examples include:
- Client Change Authorization for a chargeable request
- Client instruction or confirmation
- Product image
- Product specification sheet
- Supplier quotation or brochure
- Outdoor floor plan for landscaping
- Site drawing
- Scope of work
Useful attachments can reduce clarification questions and help the procurement team source the correct product or service more quickly.
Step 9: Review the Request
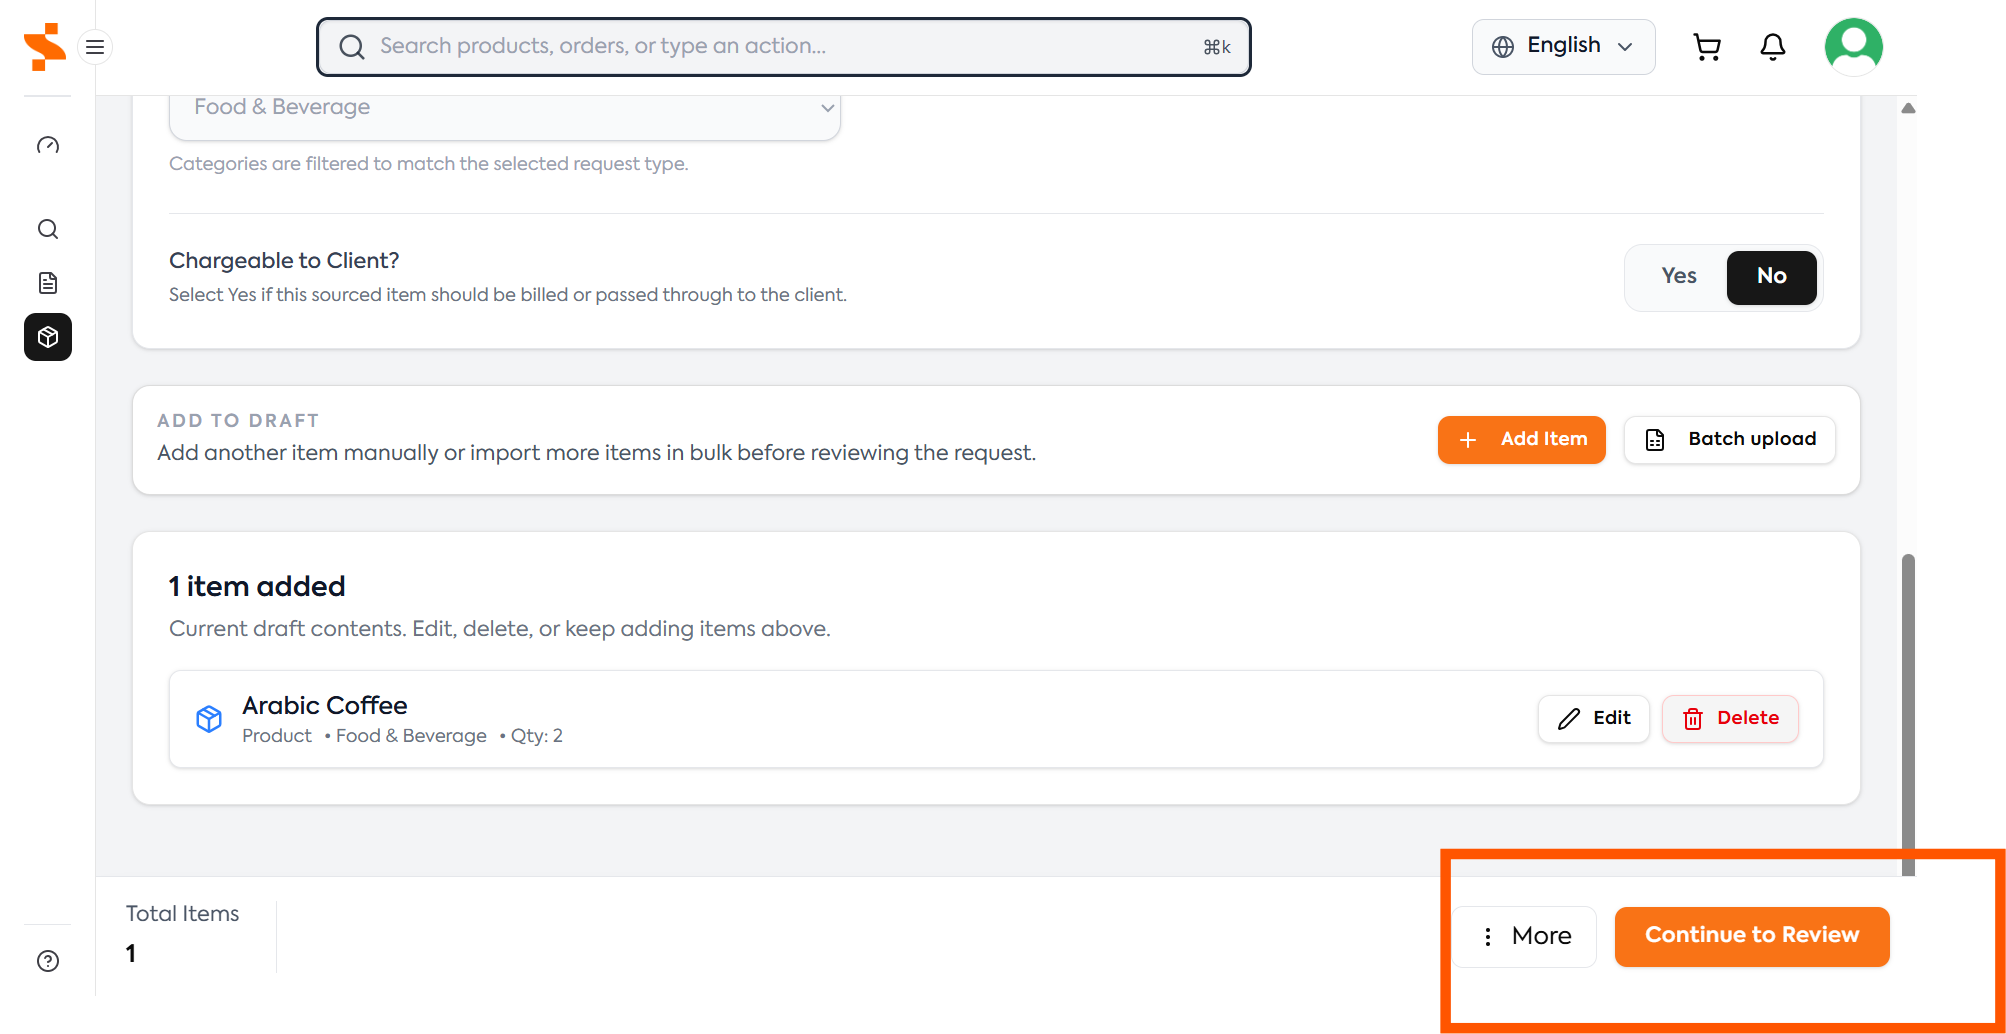
After adding all items, select Continue to Review.
Step 10: Select the Required Date
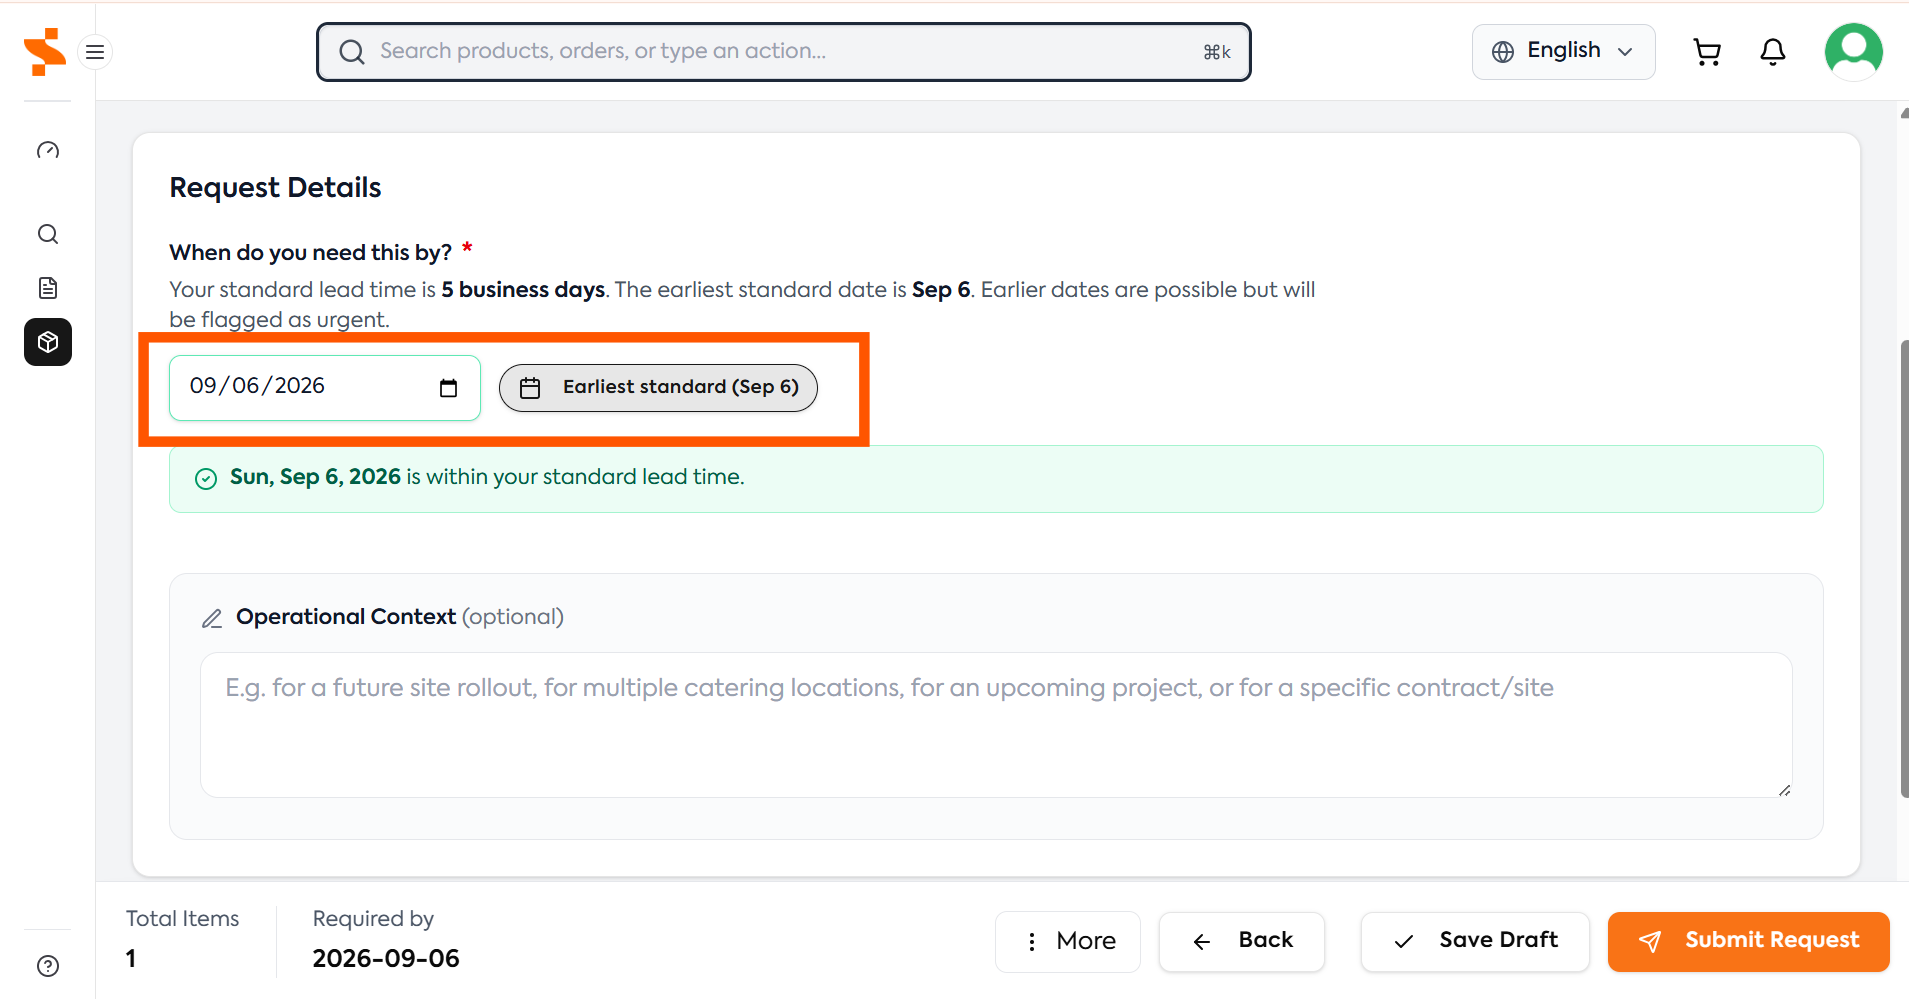
Select the date when the product or service is first required.
For a recurring item, select the date of the first required delivery.
Example:
The site needs 4 bags of coffee every month, starting on 6 September 2026.
Select 6 September 2026 as the required date.
Standard lead time
Syncor displays the standard lead time and the earliest standard date for the request.
If you select a date earlier than the standard lead time, the request will be treated as urgent and you must provide a justification.
Urgent-request justification
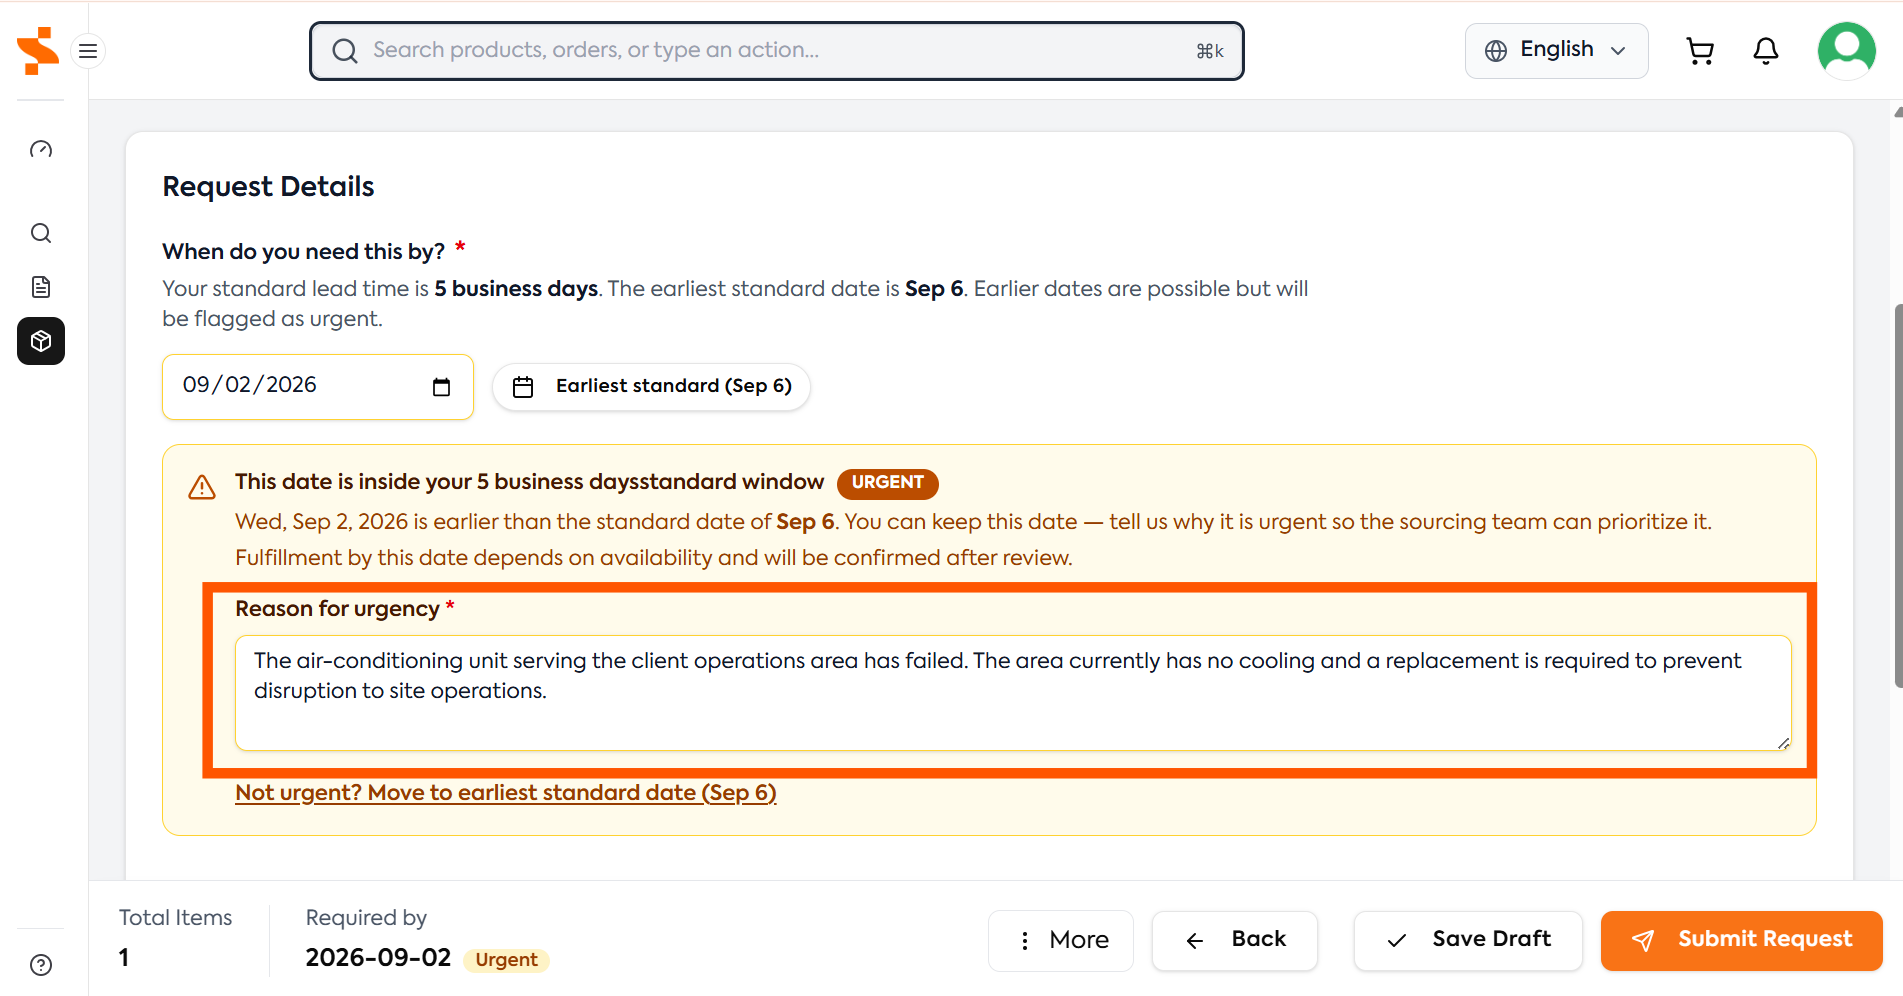
The justification must explain why the request is needed before the standard lead time.
Insufficient justification
Urgent
This does not explain the reason or business impact.
Good justification
The air-conditioning unit serving the client operations area has failed. The area currently has no cooling and a replacement is required to prevent disruption to site operations.
A useful justification explains:
- What happened
- Why the normal lead time cannot be followed
- The operational or client impact
- What may happen if the requirement is not met
Urgent requests are monitored. Repeated use may be reviewed to identify planning or forecasting issues, and feedback may be shared with the requester's manager to support improvement.
Step 11: Add Operational Context
Use the optional Operational Context field to explain the wider business need.
Examples include:
- A future site rollout
- A requirement for multiple catering locations
- An upcoming project
- A client-specific requirement
- A requirement linked to a particular contract or site
This context helps the procurement team understand how the request will be used and whether the requirement may extend beyond the first delivery.
Step 12: Select the Approval Site
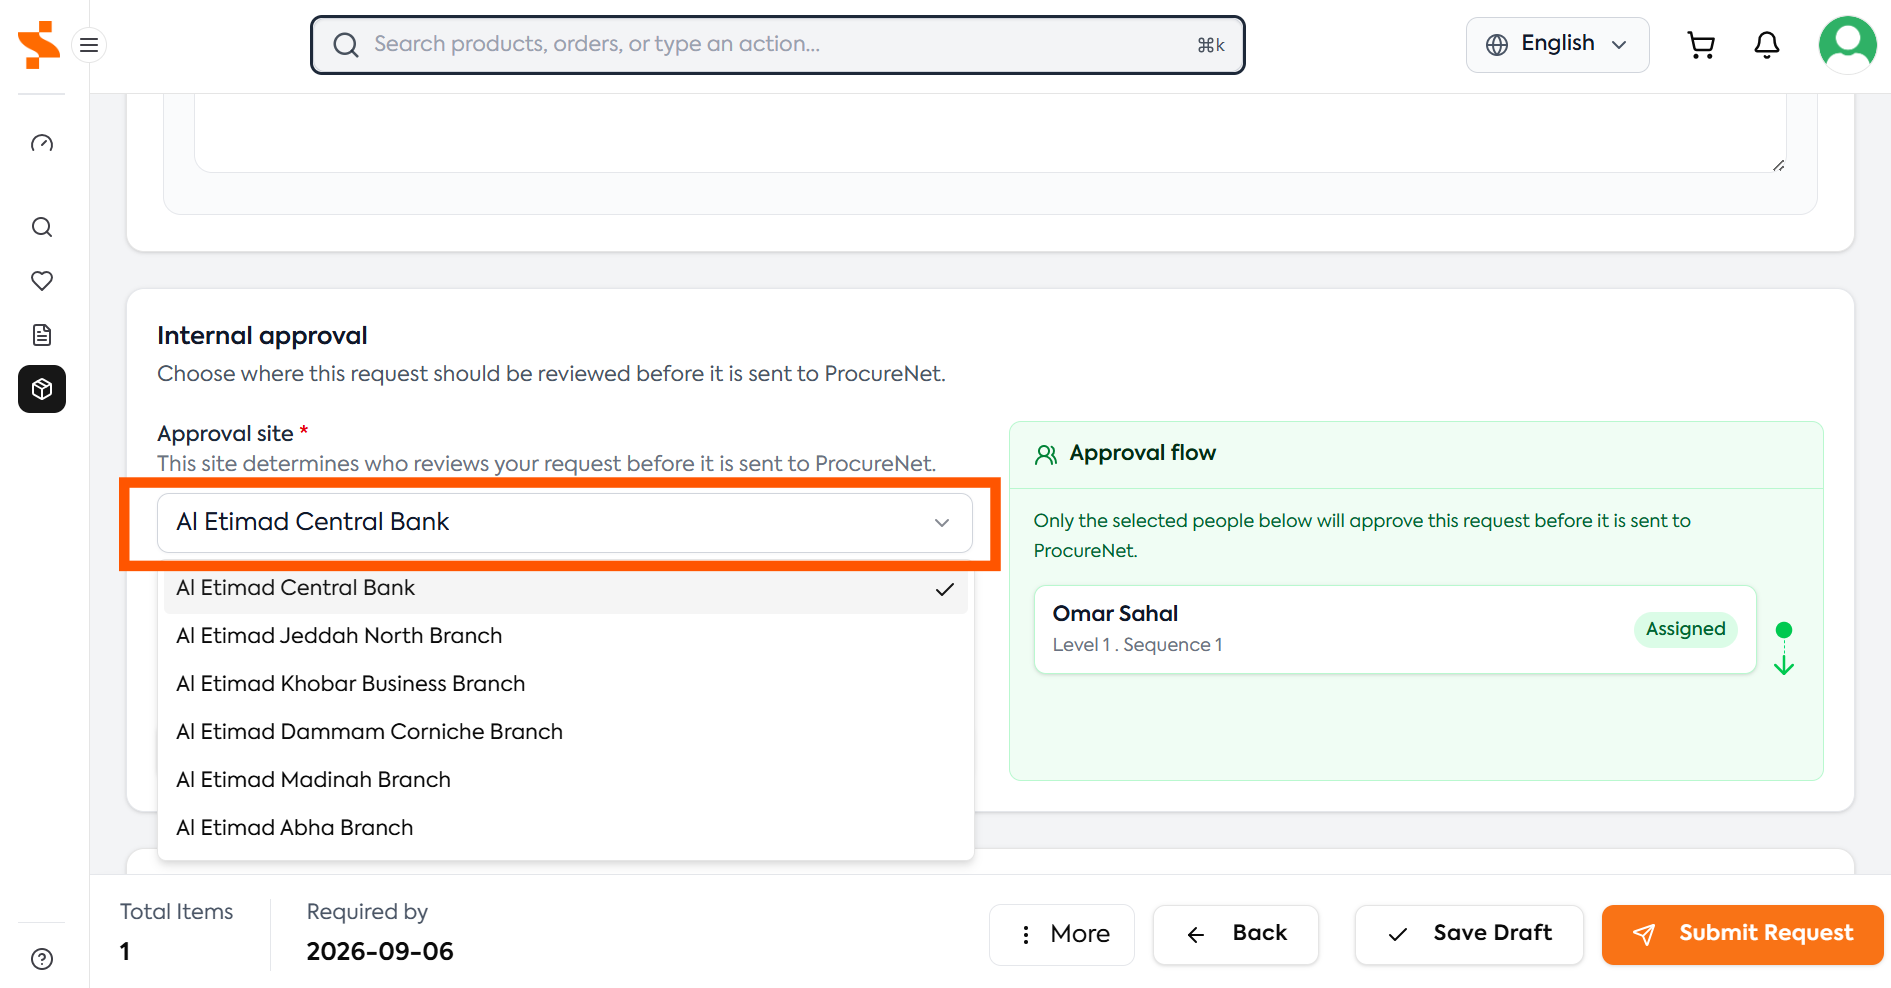
The Approval Site is mandatory.
The selected site determines:
- Who reviews and approves the request before it is sent to ProcureNet
- Which internal approval route applies
- The primary site for which the product or service will be sourced
For example, if you select:
Al Etimad Central Bank
The request is routed to the approver assigned to that site and the requirement is primarily sourced for that site. For example:
Omar Shahal is selected as he is the first approver for Al Etimad Central Bank
You can only select an approval site to which you are assigned. The available sites appear in the dropdown and the approver flow appears once the site is selected.
Step 13: Select Other Sites Where the Items Are Needed
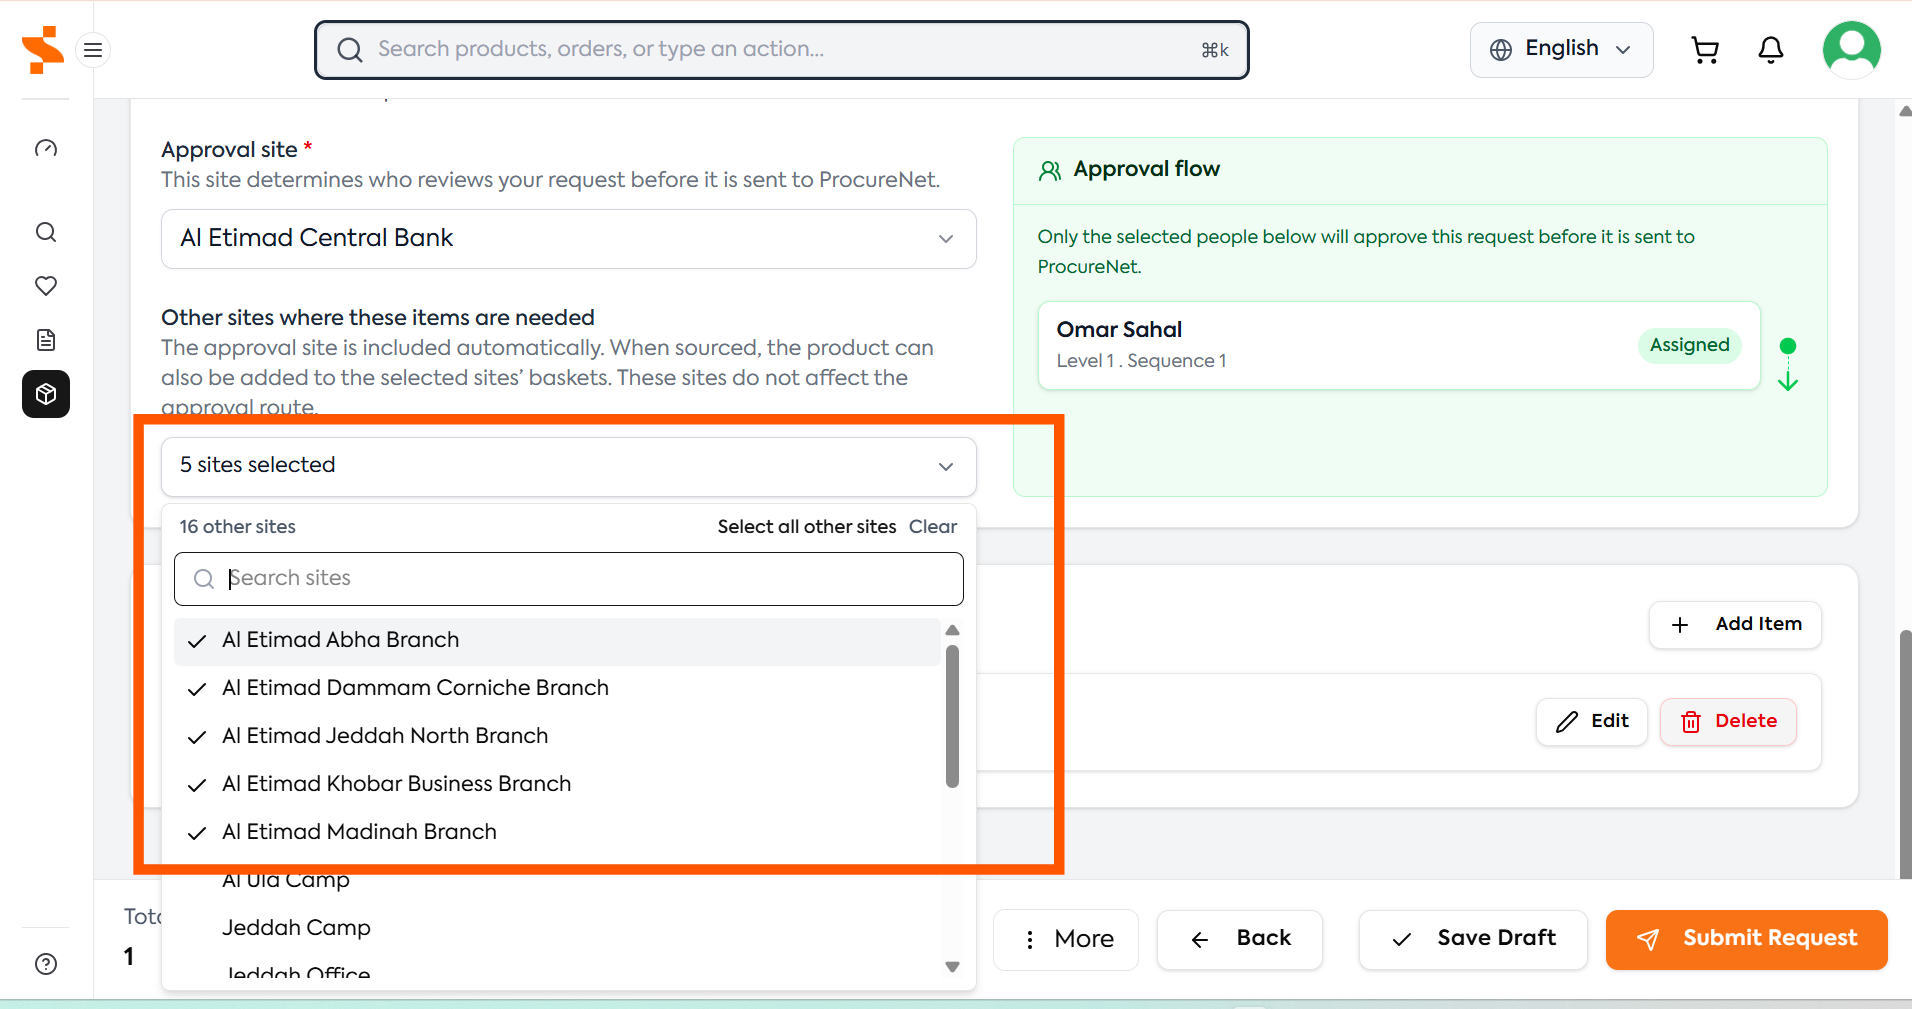
This field is optional.
The approval site is included automatically. Use Other sites where these items are needed when the same sourced products may also be required at additional sites.
For example, the product is primarily for Al Etimad Central Bank, but you think it could be used for other branches for Al Etimad:
Al Etimad Central Bank
Al Etimad Jeddah North Branch
Al Etimad Khobar Business Branch
Al Etimad Dammam Corniche Branch
Al Etimad Madinah Branch
Al Etimad Abha Branch
The additional sites:
- Do not change the approval route
- Help ProcureNet understand the wider potential demand
- May allow the sourced product to be added to the selected sites' baskets
- Can support better supplier pricing by showing a larger potential requirement
- May reduce separate sourcing activity for the same requirement
If you are unsure whether other sites need the items, you can leave this field empty.
Step 14: Save or Submit
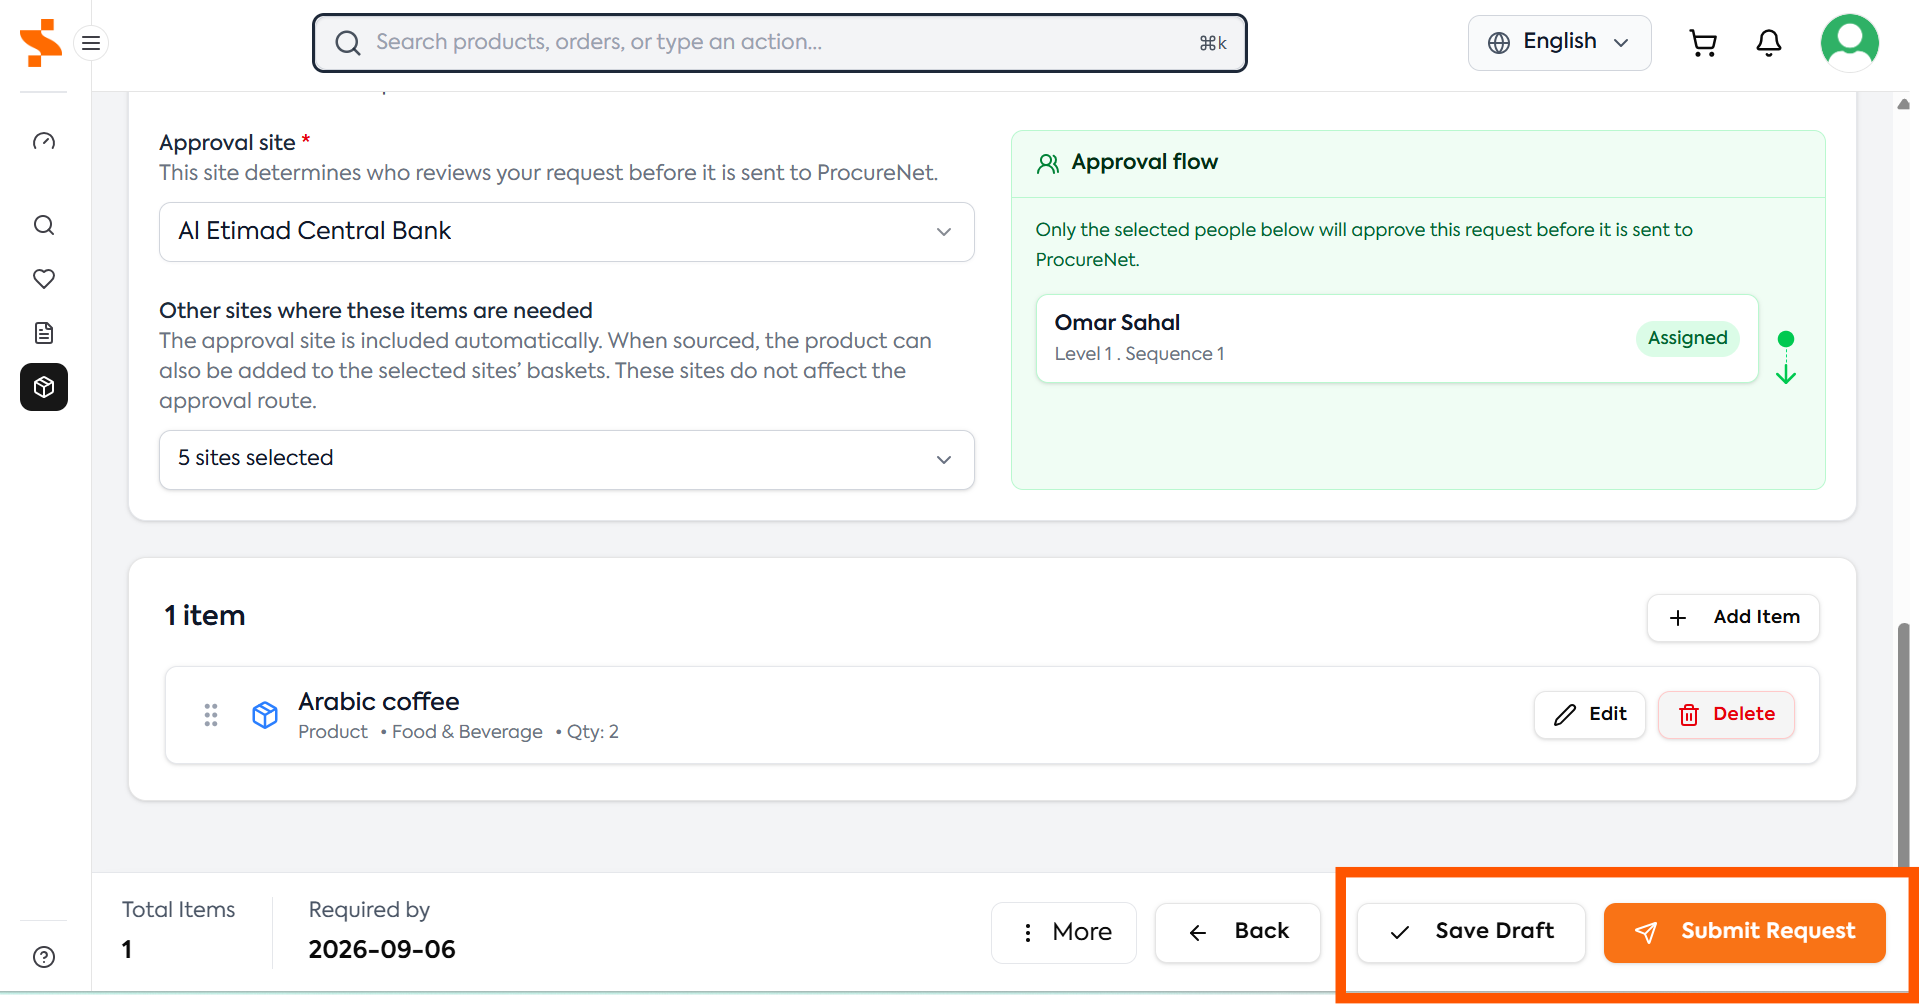
You have two options.
Save Draft
Select Save Draft to save the request and return to it later.
Use this option when:
- Specifications are still being confirmed
- Client confirmation is pending
- Supporting documents still need to be collected
- More items need to be added later
Submit Request
Select Submit Request when the request is complete.
The request is then sent through the internal approval workflow. Once fully approved, it is sent to ProcureNet for review and sourcing.
Before You Submit
Use this checklist:
- All items are products or all items are services.
- All items belong to the same category.
- All items have the same chargeability selection.
- The product or service names are clear.
- Requirements and specifications are complete.
- Frequencies, Quantities and UOMs are accurate.
- The required date is realistic.
- Any urgent justification explains the business impact.
- The correct approval site is selected.
- Other relevant sites are included where known.
- Supporting links and attachments have been added.
After submission, the request follows this general lifecycle. Pending Approval -> In Review -> Sourcing -> Completed -> Closed
To learn more about the lifecycle status see Understanding Status Flow